If you are looking for a subtle and feminine nail design, nude pink nails may be the perfect option for you. This style is timeless and can be dressed up or down to suit any occasion. In this article, we will provide step-by-step tips on how to create the best nude pink nails, as well as show you some trendy designs that you can use as inspiration. Let’s get started!
Best nail shapes for nude pink nails
There are many different nail shapes that you can choose from when opting for nude pink nails. However, some shapes are more flattering than others and tend to suit this style better. The most popular nail shapes for nude pink nails are oval, almond, and square. If you are unsure of which shape to choose, we recommend going for an oval or almond shape as they are the most versatile.
 | MISUD
Nude pink coffin nails with matte finish and white butterfly designs [Extra Long] Colors: nude, white, glossy finish 2.200+ Ratings | |
 | Artquee
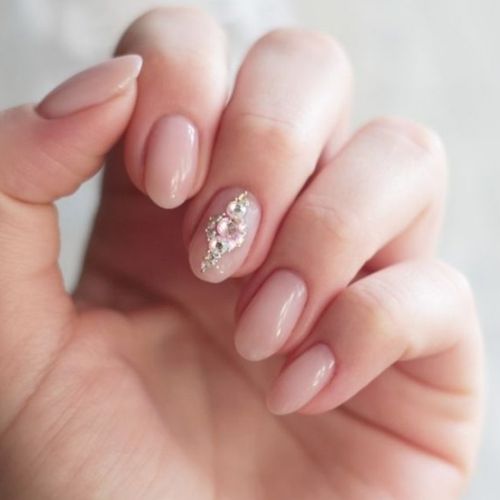
French tip press-on nails with white flowers and rhinestones Colors: white, nude pink 3.500+ Ratings | |
 | ShangMeng French tip press-on nails with white wave design [Medium length] Colors: red, nude beige 500+ Ratings | |
 | Morily
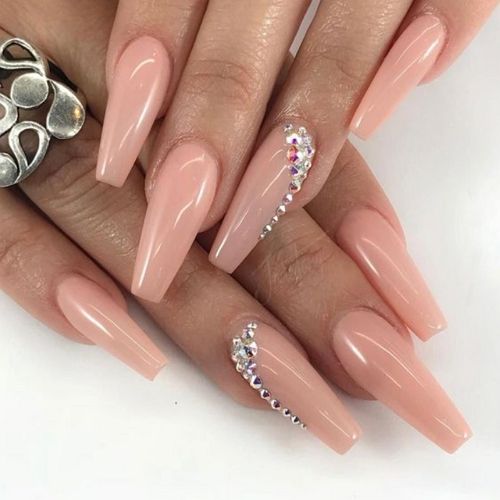
Press-on nude pink acrylic coffin nails with rhinestones and glitter [Long] Colors: red, nude 1.500+ Ratings | |
 | Vemalo
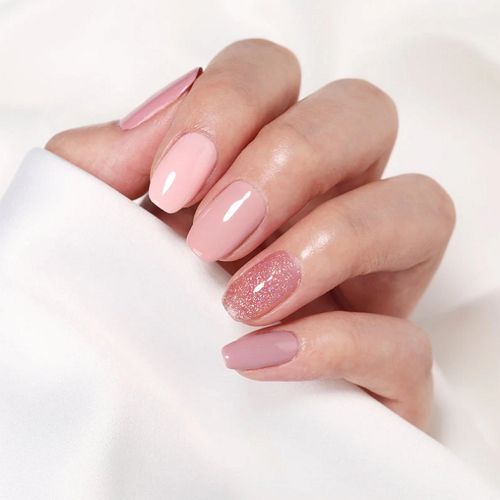
Press-on nude pink and white coffin nails with rhinestones [Medium length] Colors: red, nude pink 200+ Ratings |
Here are some tips on how to achieve each shape:
- For oval nails: file your nails into a rounded shape with slightly tapered sides. This is a classic shape that will never go out of style.
- For almond nails: start by filing your nails into a square shape. Then, use a nail file to create a curved line from the outer edge of your nail toward the center.
- For square nails: file your nails into a squared shape with straight sides and sharp corners. This is a great option if you are looking for a more dramatic look.
Once you have chosen your desired shape, it’s time to move on to the next step!
Picking the perfect nude pink polish
Now that you have chosen the perfect nail shape, it’s time to pick out a polish. When it comes to nude pink nails, there are many different shades to choose from. If you want a classic look, we recommend going for a light or medium pink shade. For something more unique, try opting for a peachy nude or mauve pink. Translucent pink clear nails are also a great option for everyday use and for a party. If you are looking for something darker, brown acrylic nails may be an option as well.
Secrets of creating perfect nail shapes
Once you have chosen your shade, it’s time to apply the polish! Here are some tips on how to achieve a perfect manicure:
- Start by applying a base coat to your nails. This will help protect your nails and ensure that your polish lasts longer.
- Once the base coat is dry, apply two coats of your desired nude pink polish. Be sure to allow each coat to dry completely before moving on to the next.
- To finish off the look, apply a top coat. This will give your nails a high-shine finish and help them last even longer.
And there you have it! These are our tips on how to create the perfect nude pink nails.
Materials used to color nails: polish, shellac, glitter, etc.
When choosing a nude pink polish, it is important to consider the undertone of your skin. If you have a cool undertone, opt for a polish with a hint of gray or blue. If you have a warm undertone, go for a slightly peachy shade. And if you’re lucky enough to have a neutral undertone, any shade of nude pink will look great on you!
Once you’ve selected the perfect polish, it’s time to get started on your nails. The first step is to shape your nails into the desired shape. For nude pink nails, we recommend either round or square shapes. Round nails tend to be more classic and timeless, while square nails are more modern and edgy.
If you’re not sure which shape to choose, try out both and see what looks best on you.
Once your nails are shaped, it’s time to apply a base coat. This will help the polish adhere to your nails and prevent staining. After the base coat is dry, apply two thin coats of polish. Be sure to let each coat dry completely before applying the next one. Once you’ve applied your final coat of polish, finish with a top coat for extra shine and protection.
Now that you know how to create the perfect nude pink nails, which are one of the most popular color choices these days, let’s take a look at some trendy designs that you can use as inspiration.
Trendy nail design ideas for nude pink nails
One popular design is to add a touch of glitter to your nude pink nails. To do this, simply apply a glitter top coat over your nude pink polish. You can also add sparkle to just one accent nail for a more subtle look.
Another design that is perfect for nude pink nails is the half-moon mani. To create this look, paint your nails with two coats of polish and let them dry completely. Then, use a detailing brush to paint a half-moon shape at the base of each nail. Finish with a top coat and voila!
If you’re looking for something a little more daring, try out the ombré effect. To do this, start by painting your nails with two coats of polish. Once they are dry, use a makeup sponge to gradient apply a second color from the tips of your nails upwards. Finish with a top coat and you’re done!
We hope you enjoyed these tips and tricks on how to create the perfect nude pink nails. Be sure to experiment with different designs and have fun!
Meet our Expert
 Elaine Andrews is a professional nail technician with 12+ years of experience. She works both with gel and acrylic nails and creates artistic nail designs for her customers. She has been training nail technicians for over 6 years and is an author of her own patented nail courses. Feel free to use the comment field below to ask Elaine something you wanted to know about nails and manicures!