Ombre nails are all the rage right now. This nail design is so popular because it is versatile and can be created in so many different ways. There are endless color combinations that you can use, and the design can be adapted to fit any occasion. In this article, we will discuss the best ombre nail designs and provide detailed step-by-step tutorials on how to create them.
What makes ombre nails so popular?
Ombre nails are popular because they are versatile and can be created in many different ways. You can use any color combination that you want, and the design can be adapted to fit any occasion. Additionally, ombre nails are easy to create and don’t require any special tools or skills.
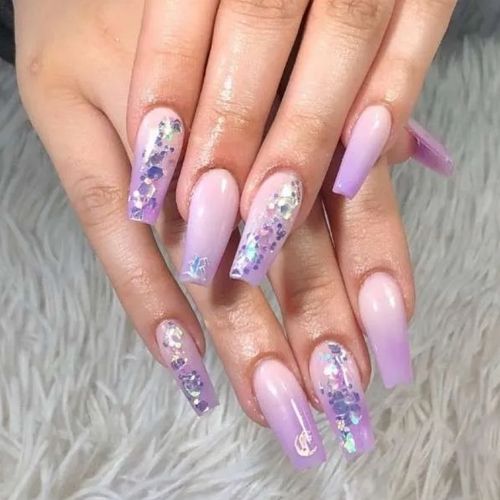
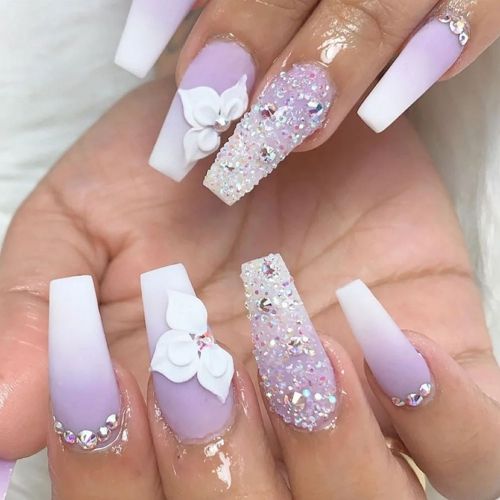
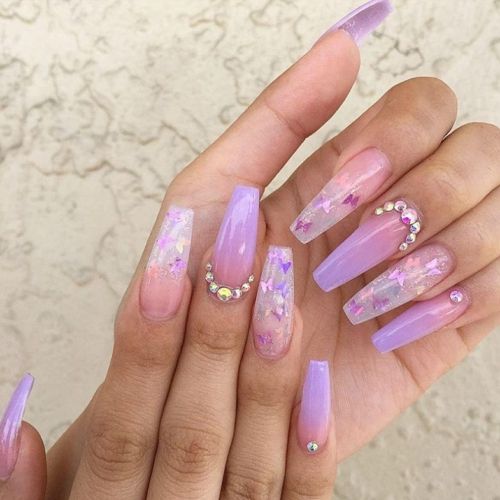
There are endless possibilities when it comes to ombre nails. You can use multiple colors or just a few. The most popular colors of ombre nails are lavender ombre, black ombre nails, brown ombre nails, and certain other colors. You can also create different designs by varying the thickness of the stripes or by adding other elements such as rhinestones or glitter.
One of the great things about ombre nails is that they look good on everyone. Whether you have short or long nails, or square or round tips, there is an ombre design that will suit you.
Ombre nails are also a great way to express your personality. With so many different color combinations to choose from, you can create a design that reflects your unique style.
Whether you want a subtle or an outrageous look, ombre nails are the perfect way to achieve it. In this blog post, we will show you some of the best ombre nail designs and provide step-by-step tutorials on how to create them. So let’s get started!
What are the best color combinations for ombre nails?
Which colors should I use for my ombre nails? This is entirely up to you! You can use any colors that you like. However, there are some color combinations that work particularly well for ombre nails.
- One popular color combination is black and white. This classic combo can be adapted to suit any occasion. For a more sophisticated look, use a glossy black polish with a matte white polish. Alternatively, you can go for more fun and youthful look by using glittery or metallic polishes in both colors.
- Another great option is to use two colors that complement each other well. A good example of this is pink and purple. These two colors work well together because they are in the same family but have different tones. You can use either light or dark shades of both colors, depending on the look you want to achieve.
- If you want something really bold and daring, try using three or more colors for your ombre nails. This is a great way to create a statement look that will really turn heads. For best results, choose colors that are in the same family but have different tones.
Ombre nails are a great way to express your personality and style. In this guide, we will show you some of the best color combinations for ombre nails and provide step-by-step tutorials on how to create them. So let’s get started!
Top nail shapes to create an ombre design
Creating ombre nails is easier than you might think. In this section, we will show you how to create ombre nails in three of the most popular nail shapes: square, oval, and stiletto.
✔ Square:
If you have square nails, then you’re in luck! This is one of the easiest shapes to create an ombre design on. To get started, paint your nails with a base color of your choice. Once the base color has dried, apply a striping tape or scotch tape horizontally across your nail, about halfway up from the bottom. Next, use a second color to paint the top half of your nail above the striping tape. Finally, remove the striping tape, and voila! You’ve just created an ombre design on your nails.
✔ Oval:
Oval nails are another great shape for creating ombre nails. To get started, paint your nails with a base color of your choice. Once the base color has dried, apply a striping tape or scotch tape horizontally across your nail, about halfway up from the bottom. Next, use a second color to paint the top half of your nail above the striping tape. Finally, remove the striping tape, and voila! You’ve just created an ombre design on your nails.
✔ Stiletto:
If you have stiletto nails, then you’re in luck! This is one of the easiest shapes to create an ombre design on. To get started, paint your nails with a base color of your choice. Once the base color has dried, apply a striping tape or scotch tape horizontally across your nail, about halfway up from the bottom. Next, use a second color to paint the top half of your nail above the striping tape. Finally, remove the striping tape, and voila! You’ve just created an ombre design on your nails.
How to create ombre nail design: step-by-step instruction
Now that you know the basics of creating ombre nails, it’s time to get into the nitty-gritty and learn how to create this nail design step-by-step.
To get started, you will need the following supplies:
- Nail polish in two colors of your choice
- Striping tape or scotch tape
- Nail file
- Nail buffer
First, start by painting your nails with a base color of your choice. Once the base color has dried, apply a striping tape or scotch tape horizontally across your nail, about halfway up from the bottom. Next, use a second color to paint the top half of your nail above the striping tape. Finally, remove the striping tape, and voila! You’ve just created an ombre design on your nails.
Now that you know how to create ombre nails, experiment with different color combinations and have fun! Remember, there are no rules when it comes to nail art, so feel free to get creative and express your personality through your nails.
What other nail design elements look great on ombre nails
In addition to the classic two-toned ombre look, a few other design elements can take your nails to the next level. Here are a few of our favorites:
- Glitter: Adding a touch of glitter to your ombre nails is a great way to add some sparkle and pizzazz. Simply paint your nails with a base color, then apply a layer of glitter over the top before adding the second color for your ombre design.
- Nail art: Nail art is always a great way to add some personality to your nails. And when you combine it with an ombre design, you really have something special! To get started, simply paint your nails with a base color, then add your favorite nail art design over the top before adding the second color for your ombre.
- Stamping: Stamping is another great way to add some personality to your nails. Simply paint your nails with a base color, then stamp over the top with your favorite design before adding the second color for your ombre.
These are just a few of the many possibilities when it comes to ombre nails. So get creative and have fun! Remember, there are no rules when it comes to nail art, so feel free to express your personality through your nails.
Reed More about French Tip Nails
Meet our Expert
 Elaine Andrews is a professional nail technician with 12+ years of experience. She works both with gel and acrylic nails and creates artistic nail designs for her customers. She has been training nail technicians for over 6 years and is an author of her own patented nail courses. Feel free to use the comment field below to ask Elaine something you wanted to know about nails and manicures!